Did you know that you can do brow lamination at home easily? That’s right lamination is no longer the term that is used only to refer to the shiny protective finish that you use to protect your important documents and papers. A brow lamination is a perm for your brows to make them stand up straighter so they get the illusion of a thicker fuller brow. Brow lamination is a great micro blading alternative as well as the perfect solution for your eyebrow concerns such as gaps, over plucking, thin eyebrows and unruliness.
Brow lamination is a very innovative technique that gets its origins from Russia. While scrolling down your Instagram feed you must have noticed models with slicked-up, shiny, perfectly shaped eyebrows. Well, that’s what brow lamination is. More or less it is a semi-permanent soap brow.
 Brow Lamination At Home
Did you Know that you could do Brow Lamination at Home?
You might be getting your brow lamination done professionally and if you think that it is something which is just for actresses and models, you couldn’t be more wrong. You could very well do it yourself from the comfort of your home. If your eyebrows look like a hot mess and you do not have time to out and get it done professionally try this DIY brow lamination at home.
DIY Brow Lamination At Home
 Brow Lamination At Home
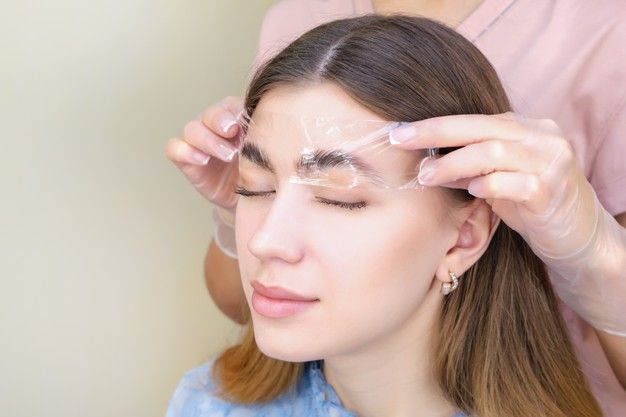
Typically when people go to get this done professionally, they also do a combination of brow tinting after which your brows look fuller and you don’t have to fill in your brows for the next couple of weeks. This treatment lasts for almost 4 to 6 weeks. For doing brow lamination at home, you will need a brow lamination kit. Eyebrow lamination kit is designed especially for brow lamination. Since it contains all the products required for your brow lamination, it is advisable to use any such kit. Usually, any brow lamination kit consists of lash glue, perm lotions, cleansing oils and tools, nutrition serum and fixation serum. Apart from all this, you’ll need plastic wrap. With all your ingredients handy, let’s get to the process:
- First step – Cleanser your eyebrows using a cleanser. You may find your eyebrow cleanser in your brow lamination kit or you could use an alcohol-based cleanser to clean your eyebrows. This is to make sure that no oil or dirt hair on your eyebrows.
- The second step is to take your brush and rub your lift serum all over your eyebrows.
- The third step is to cover your eyebrows with plastic wrap. You have to put on the plastic wrap on your eyebrows for 8 to 12 minutes.
- The next step would be to brush your brows with a little spoolie brush in the direction that you want your eyebrows to stick.
- The next step is the fixation glue. Put your glue all over your eyebrows and put on your plastic wrap again. Keep the plastic wrap for the next 8 to 12 minutes just like you did after applying the lifting serum.
- And the last step is the brow nutrition; put the nutrition serum to make sure that the nutrition remains intact.
Make sure not to get them wet for the next 24 hours.
Benefits of Brow Lamination
 Brow Lamination At Home
If you are way too concerned about how your brows look especially if you have got thinner brows, eyebrow lamination would make your brows look thicker and fuller. Since it helps in pulling the eyebrow hair vertically upward it might look like you are experiencing hair growth in your eyebrows. Some of the concerns that might be addressed if you are going for brow lamination are going:
- Thin hair
- Gaps in your eyebrows
- Unevenness
Is Eyebrow Lamination Completely Safe?
While brows lamination is easier as compared to brow surgery or other related processes there might be some potential risks as well that you need to be aware of.
 Brow Lamination At Home
So before getting your brow lamination done make sure that you are aware of the potential side effects. Some of these side effects include
- Itching
- Bumps
- Swelling
- Redness
You may notice these side effects either beneath your eyebrows or above them but in some cases, they may even extend to your eyelids. If you are diagnosed with Rosacea or eczema or have sensitive skin you might not be fit for getting an eyebrow lamination. Brow lamination could lead to potential damage to your eyebrows; this happens especially if you are repeating the process way too often. If the chemicals run into the eyes this may lead to another more serious risk such as eye damage.
For How Long does Brow Lamination Stay?
The effects of eyebrow lamination are temporary. To maintain your new voluminous eyebrows you will have to repeat the process every couple of months. Make sure to apply a moisturizing cream or oil to protect your eyebrows after your treatment.
 Brow Lamination At Home
Just like you take care of your skin by moisturizing it on regular basis make sure that you are applying moisturizing cream or oil to your eyebrows to maintain a damage-free and healthy eyebrow. Brow lamination is the latest brow treatment that is creating a new buzz in the beauty industry. This miraculous beauty treatment which gives you shiny and fuller eyebrows are a must-try especially when you can do it in the comfort of your home.
You can very easily find this eyebrow lamination kit online or at any local store and try this at home. It helps you achieve the perfect shape that you want for your brow without any hassle. It is a very comfortable treatment; you might feel a little tingling sensation when the cream is on. Just make sure that after doing your brow lamination you avoid getting your brows wet which means no exercise or hot showers. Be very careful while applying the liquids on your eyebrows, so that it doesn’t damage your eyes. With this DIY treatment, you are going to get your brow lamination at home just like that favorite model of yours.
Recommended reading: Eyebrows Styles 101